How to Make Custom Thumbnails with AI: A Complete Guide for Creators?
- Back in 2019, I spent about 45 minutes creating each thumbnail for my YouTube videos: Photoshop layers, stock photo hunting, font matching—the whole ordeal. Fast forward to today, and I can produce thumbnails that perform better in under 10 minutes using AI-powered tools. The shift has been remarkable, though it came with a learning curve I wasn’t expecting.
- If you’re looking to streamline your thumbnail creation process while maintaining quality, this guide breaks down everything I’ve learned from experimenting with various AI platforms over the past two years.
Why Thumbnails Still Matter More Than Ever
- Before diving into the technical stuff, let’s acknowledge an uncomfortable truth: your content could be fantastic, but if the thumbnail doesn’t grab attention within milliseconds, most people will scroll right past it.
- YouTube’s own data suggests that 90% of top-performing videos feature custom thumbnails. Instagram carousels with compelling cover images see 2-3x higher engagement. LinkedIn articles with strong visual previews get significantly more clicks than text-only posts.
- The thumbnail isn’t just decoration—it’s your content’s first impression and, honestly, its most important marketing asset. This is precisely why the efficiency that AI brings to thumbnail creation matters so much. When you can test multiple thumbnail concepts quickly, you’re no longer gambling on a single design.
Understanding What AI Can Actually Do for Thumbnails
- Let me be upfront about something: AI isn’t a magic button that produces perfect thumbnails automatically. What it does exceptionally well is accelerate specific parts of the creative process.
- Here’s what AI handles effectively:
- Background generation – Need a dramatic sky, abstract patterns, or a specific environment? AI excels here. Instead of hunting through stock photo sites, you can describe exactly what you need.
- Style transformation – Taking an ordinary photo and applying artistic styles—whether that’s comic book aesthetics, cinematic colour grading, or minimalist designs—becomes straightforward.
- Element creation – Icons, decorative elements, and supporting graphics can be generated on demand rather than sourced elsewhere.
- Upscaling and enhancement – Lower quality images can be sharpened and improved without the manual work that Photoshop traditionally required.
- What AI still struggles with:
- Consistent human faces – If you need recognizable portraits of yourself or specific people, AI-generated faces rarely work. You’ll want to composite real photos.
- Text and typography – AI-generated text within images remains unreliable, mainly. Expect to add text manually.
- Brand consistency – Maintaining exact colours, styles, and elements across dozens of thumbnails requires human oversight and templates.
Choosing the Right AI Tool for Your Needs
- After testing about 15 different platforms, I’ve narrowed it down to the ones that genuinely deliver results for thumbnail creation.

For Quick, Template-Based Thumbnails: Canva
- Canva’s AI features have matured significantly. Their Magic Media tool generates images directly within the platform, and the Text-to-Image function lets you create background elements without leaving your project.
- What I appreciate about Canva is the integration. You generate an element, drag it into your thumbnail template, adjust sizing, add your text—everything happens in one workspace. For creators who need to produce thumbnails consistently and quickly, this streamlined workflow saves considerable time.
- The limitation? Creative ceiling. Canva’s AI-generated content tends toward a polished but somewhat generic aesthetic. If you’re aiming for highly distinctive visuals, you might hit walls.
For High-Quality, Unique Imagery: Midjourney
- Midjourney produces some of the most visually striking AI imagery available. The learning curve is steeper since it operates through Discord, but the quality justifies the extra effort for many creators.
- I typically use Midjourney when I need:
- Dramatic, attention-grabbing backgrounds
- Conceptual imagery that would be expensive to photograph
- Stylised illustrations that stand apart from typical stock imagery
- A practical example: For a video about productivity myths, I needed a surreal image of clocks melting into a desk. Stock photos? Nothing close existed. Midjourney delivered precisely what I envisioned in about four iterations.
For Photorealistic Generations: Leonardo AI
- Leonardo’s strength lies in photorealistic outputs and the fine control it offers over generation parameters. If your thumbnail style leans toward photography rather than illustration, Leonardo often produces more usable results than more artistic platforms.
- Their training models for specific aesthetics—particularly those with a cinematic or product focus—tend to be strong. The platform also offers inpainting and outpainting, allowing you to extend images or modify specific regions.
For Quick Background Removal and Compositing: Remove.bg and Photoroom
- While not strictly generative AI, these tools have become indispensable in my thumbnail workflow. The background removal algorithms have become remarkably accurate, handling complex edges such as hair or transparent objects that previously required manual masking.
- I often combine these with generative tools: photograph myself against any background, remove that background instantly, then composite onto an AI-generated scene.
Step-by-Step: Creating a Thumbnail from Scratch
- Let me walk through my actual process for a recent morning-routine video. This represents a typical workflow I’ve refined over many projects.
Step 1: Define the Concept
- Before touching any software, I sketch the thumbnail concept—sometimes literally with pen and paper, sometimes just mentally mapping it out.
- For the morning routine video, I knew I wanted:
- I am in the frame (builds channel recognition)
- Split composition showing contrast (messy morning vs. productive morning)
- Warm colour palette suggesting energy and positivity
- Minimal text—just “MORNING ROUTINE” in bold type
Step 2: Generate Background Elements
- In Midjourney, I prompted for a warm, golden-hour bedroom scene with soft lighting and minimal furniture. The specific prompt looked something like: “modern minimalist bedroom, warm morning sunlight streaming through curtains, golden hour, cosy atmosphere, editorial photography style, shallow depth of field.”
- It took three generations to get something suitable. The first was too cluttered, the second had weird window geometry, the third nailed the mood I wanted.
Step 3: Capture and Prepare the Human Element
- I photographed myself with my phone against a plain wall, mimicking the lighting angle I wanted for the final composite. Even natural window light works fine—you don’t need elaborate setups.
- After selecting the best shot, I ran it through Photoroom for background removal. The entire process took two minutes.
Step 4: Composite Everything
- This is where Canva or Photoshop comes in. I layered:
- The AI-generated background
- My extracted portrait, positioned on the right third
- A subtle shadow beneath myself for grounding
- Colour adjustments to match my portrait’s lighting with the background
Step 5: Add Typography
- Text went on last. For this thumbnail, I used bold sans-serif type positioned on the left third, sized large enough to read at small sizes. The colour was pulled from the warm tones already present in the image.
Step 6: Check at Small Sizes
- This step gets skipped too often. Your thumbnail will primarily appear at sizes smaller than a postage stamp. I always preview at actual display size—if the text isn’t readable or the composition becomes muddy, revisions are needed.
- The entire process, from concept to final export, took about 12 minutes.
Advanced Techniques Worth Learning
- Once you’ve mastered basic generation and compositing, several techniques can further elevate your thumbnails.
Consistent Style Seeds in Midjourney
- If you find a visual style that works, Midjourney lets you use “style seeds” to maintain consistency across generations. This becomes valuable when creating thumbnail series—you want them to feel related without being identical.
- Grab the seed from a successful generation and reference it in future prompts. The consistency isn’t perfect, but it’s close enough for most purposes.
ControlNet for Precise Composition
- If you’re using Stable Diffusion locally or through platforms that support it, ControlNet provides remarkable control over generation. You can sketch a rough composition and have the AI fill it in while respecting your layout.
- This is particularly useful when you need specific element placement—like ensuring negative space exists exactly where you’ll add text.
AI Upscaling for Older Content
- Revisiting older thumbnails and running them through upscaling AI can be worth the effort. If your channel has evolved visually, updating old thumbnails can breathe new life into existing content without complete redesigns.
Multiple Variations for Testing
- One underutilised advantage of AI speed: you can create multiple thumbnail variations and test which performs better. Platforms like YouTube allow thumbnail A/B testing—take advantage of it.
- I typically create three variations per video now, letting actual click-through data determine which approach works rather than relying purely on instinct.
Common Mistakes I See (And Have Made)
- Learning from errors accelerates growth, so here are pitfalls worth avoiding.
- Overreliance on AI text – Current AI models struggle with text. Letters get distorted, words are misspelt, and spacing goes weird. Always add text manually in post.
- Ignoring platform specifications – YouTube thumbnails display at different sizes depending on device and placement. What looks perfect on a desktop might become illegible on mobile. Always verify across contexts.
- Too much complexity – AI can generate incredibly detailed images, but detail often hurts thumbnails. Simpler compositions with clear focal points outperform busy, complex imagery almost universally.
- Forgetting brand consistency – It’s tempting to chase every style trend that AI makes possible. But viewers recognise consistency. Establishing a recognisable thumbnail style—colours, fonts, and composition approach—builds channel identity.
- Not fact-checking generations – AI occasionally generates anatomically incorrect elements, impossible architectures, or subtle errors. Always review carefully before publishing.
Ethical Considerations Worth Thinking About
- This topic deserves honest discussion. Using AI for thumbnails raises questions worth considering.
- Authenticity – If your thumbnail shows you in a location you’ve never visited, generated entirely by AI, some viewers might find this misleading. I tend to keep AI usage limited to backgrounds and effects rather than fabricating scenarios.
- Copyright concerns – AI models train on existing imagery. The legal landscape remains unsettled, though for thumbnail creation (typically transformative, non-commercial regarding the generated image itself), risks appear minimal. Still, staying informed about evolving regulations makes sense.
- Disclosure – Should you mention AI involvement in your creative process? There’s no consensus here. I don’t typically disclose thumbnail methods since the final image primarily features real photos of myself, but I’m transparent when asked directly.
- Skill atrophy – A practical concern: Relying heavily on AI can diminish traditional design skills. I still practice manual design work to maintain foundational abilities that AI supplements rather than replaces.
Platform-Specific Considerations
- Different platforms have different requirements and expectations worth understanding.
- YouTube – 1280×720 pixels minimum, though 1920×1080 provides more flexibility. A duration overlay often covers the right third, so keep critical elements left of centre.
- Instagram Reels – Vertical format thumbnail extraction from video or custom upload. Text must remain within the central safe zones.
- LinkedIn – More conservative aesthetics typically perform better. Dramatic AI imagery might feel misaligned with platform expectations.
- Podcast Platforms – Square format dominates. Simplicity matters even more given display sizes.
Time and Cost Investment
- Real talk about what this actually requires.
- Free options exist – Canva’s free tier includes AI generation. Microsoft Designer offers similar functionality. For creators just starting or operating on tight budgets, professional-quality thumbnails are achievable without subscription costs.
- Paid tiers deliver more – Midjourney runs $10-30 monthly, depending on usage needs. Leonardo offers free tiers, but better capabilities come with subscriptions. Canva Pro includes expanded AI features.
- Learning curve investment – Expect 5-10 hours of experimentation before workflows feel smooth. Prompt crafting is genuinely a skill that improves with practice.
- Long-term time savings – For creators producing content regularly, the efficiency gains compound. What once took an hour per thumbnail can drop to 10-15 minutes with practised workflows.
Looking Forward
- AI thumbnail creation continues evolving rapidly. Features considered advanced today will likely become baseline capabilities within a year or two.
- What I’m watching:
- Better text generation within images
- More consistent face handling
- Improved integration between generation and editing platforms
- Enhanced video-to-thumbnail automation
- For now, the hybrid approach—AI generation combined with human composition and oversight—produces the best results. Pure automation still falls short, but as a force multiplier for human creativity, these tools have genuinely transformed what’s possible for independent creators.
Final Thoughts
- The goal isn’t replacing creativity with automation. The goal is to eliminate the tedious parts of thumbnail creation so you can focus on the creative decisions that actually matter—concept, composition, and communication.
- AI handles the grunt work: background generation, element creation, and enhancement. You hold the vision: what will grab attention, what accurately represents your content, and what builds your brand over time.
- That division of labour, when well balanced, produces better thumbnails more efficiently than either approach alone. And in a landscape where attention is the scarcest resource, that efficiency translates directly into opportunity.
- Start experimenting. Generate some backgrounds. Composite them with your own photos. Add text manually. Review at small sizes. Iterate. The learning curve is real, but shorter than you might expect—and the results speak for themselves.
The Psychology Behind Click-Worthy Thumbnails
Understanding why specific thumbnails perform better than others goes beyond technical execution. There’s genuine psychology at play that AI tools can help you implement more effectively.
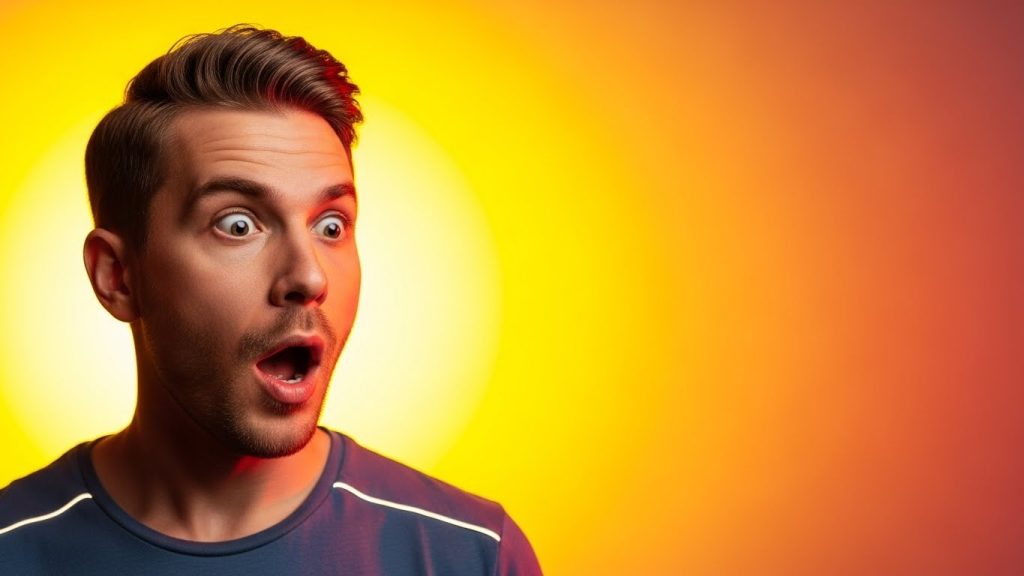
Faces capture attention first. Eye-tracking studies consistently show that human faces draw immediate focus. This explains why so many successful creators prominently feature themselves in their thumbnails. The expression matters tremendously—exaggerated emotions like surprise, excitement, or curiosity outperform neutral expressions by significant margins.
When generating AI backgrounds, I intentionally create compositions that frame the human element rather than compete with it. Busy backgrounds with lots of detail fight for attention. Simpler, more atmospheric backgrounds let the face remain the focal point.
Colour contrast drives visibility. In a sea of thumbnails, yours needs to pop. Complementary colour combinations—blue and orange, purple and yellow, red and green—create natural visual tension that attracts the eye.
I often use AI colour grading tools to push my thumbnails toward these high-contrast palettes. A naturally lit photo might look pleasant but underwhelming at thumbnail size. Boosting saturation and adjusting toward complementary schemes makes the same image far more competitive.
Curiosity gaps work consistently. Thumbnails that suggest a story without revealing everything create cognitive tension. Viewers click because they need resolution. This might mean showing a “before” state with implied transformation, featuring unexpected combinations, or capturing dramatic moments mid-action.
AI excels at creating these scenario-based images. Describing a specific moment or situation generates imagery with inherent narrative tension that static stock photography rarely captures.

Analysing What Works in Your Niche
Before developing your thumbnail style, spend time studying what already performs in your content space. This research phase pays dividends.
Pull up the top ten channels in your niche. Screenshot their most-viewed videos’ thumbnails. Arrange them together and look for patterns. You’ll likely notice:
- Common colour schemes that dominate
- Typical composition approaches
- Text styles and placement conventions
- Expression types and energy levels
This isn’t about copying—it’s about understanding audience expectations. Viewers in different niches respond to various visual languages. Tech audiences might prefer clean, minimalist thumbnails. Entertainment audiences might expect bold colours and dramatic expressions. Educational content often features text-heavy designs with clear value propositions.
AI tools let you quickly generate variations that fit established patterns while adding your unique spin. Generate five background options in the style that dominates your niche, then composite your own elements to differentiate.
Seasonal and Trending Considerations
Something often overlooked: thumbnails benefit from timely updates and seasonal relevance.
Holiday periods offer natural opportunities. A video about gift ideas performs better when the thumbnails feature seasonal colours and elements. AI generation makes creating holiday-themed variations straightforward—you’re not limited to whatever stock photography happens to exist.
Trending visual styles also matter. Currently, cinematic colour grading with teal and orange tones performs well across many niches. Retro aesthetics have seen a resurgence. Minimalist designs with bold typography remain consistently effective.
Staying aware of these trends and adjusting your AI prompts accordingly keeps your thumbnails feeling current rather than dated. What worked visually three years ago might now signal outdated content, even if the actual video remains valuable.
I revisit evergreen content quarterly to assess whether thumbnail refreshes boost performance. Sometimes, a simple background regeneration with current aesthetic preferences revives videos that had plateaued.
Building Your Personal Thumbnail System
After creating hundreds of thumbnails, I’ve developed a personal system that balances efficiency with quality. Sharing this framework might help you build your own.
Template-based approach. I maintain three to four thumbnail templates that define my channel’s visual identity. Each template has preset text placement, colour schemes, and composition grids. When creating new thumbnails, I start with whichever template best fits the content.
AI generation library. Rather than generating fresh backgrounds for every video, I periodically run generation sessions, creating twenty to thirty background options across different moods and themes. These get saved and categorised. When thumbnail time comes, I browse existing options first before generating new ones.
Expression photo bank. Every few months, I photograph myself with various expressions—surprised, thoughtful, excited, sceptical, amazed. Good lighting, consistent framing. These get processed through background removal and stored. Having ready-made portrait options dramatically speeds up production.
Review and iteration protocol. Before finalising, every thumbnail undergoes three checks: a small-size legibility test, a comparison with recent uploads for consistency, and quick feedback from a trusted viewer, when possible.
This system means most thumbnails take under ten minutes while maintaining quality standards. The upfront investment in templates, libraries, and photo banks pays ongoing dividends.
Handling Thumbnail Revisions and Updates
Not every thumbnail performs as expected. Developing a healthy approach to revision prevents frustration and improves results over time.
Track click-through rates for at least seven days before making judgments. Early performance can be misleading due to variations in subscriber notifications and the browse feature. After a week, patterns become clearer.
If a video underperforms expectations, the thumbnail is the first element to examine. Ask honestly: Does it clearly communicate the video’s value? Does it stand out in suggested video columns? Does the expression and energy match the content?
AI makes revision painless. Generate alternative backgrounds, try different colour treatments, adjust text sizing or placement. Create three variations and test the most promising one. Sometimes minor adjustments—a brighter background, larger text, more dramatic expression—produce measurable improvements.