If you asked me two years ago how I felt about Artificial Intelligence in the editing room, I would have laughed—or maybe cried. Back then, “AI” in video meant glitchy automated captions that mistook “algorithm” for “al gore rhythm,” or auto-reframing tools that accidentally cropped my head out of the shot. It was a novelty—a toy.
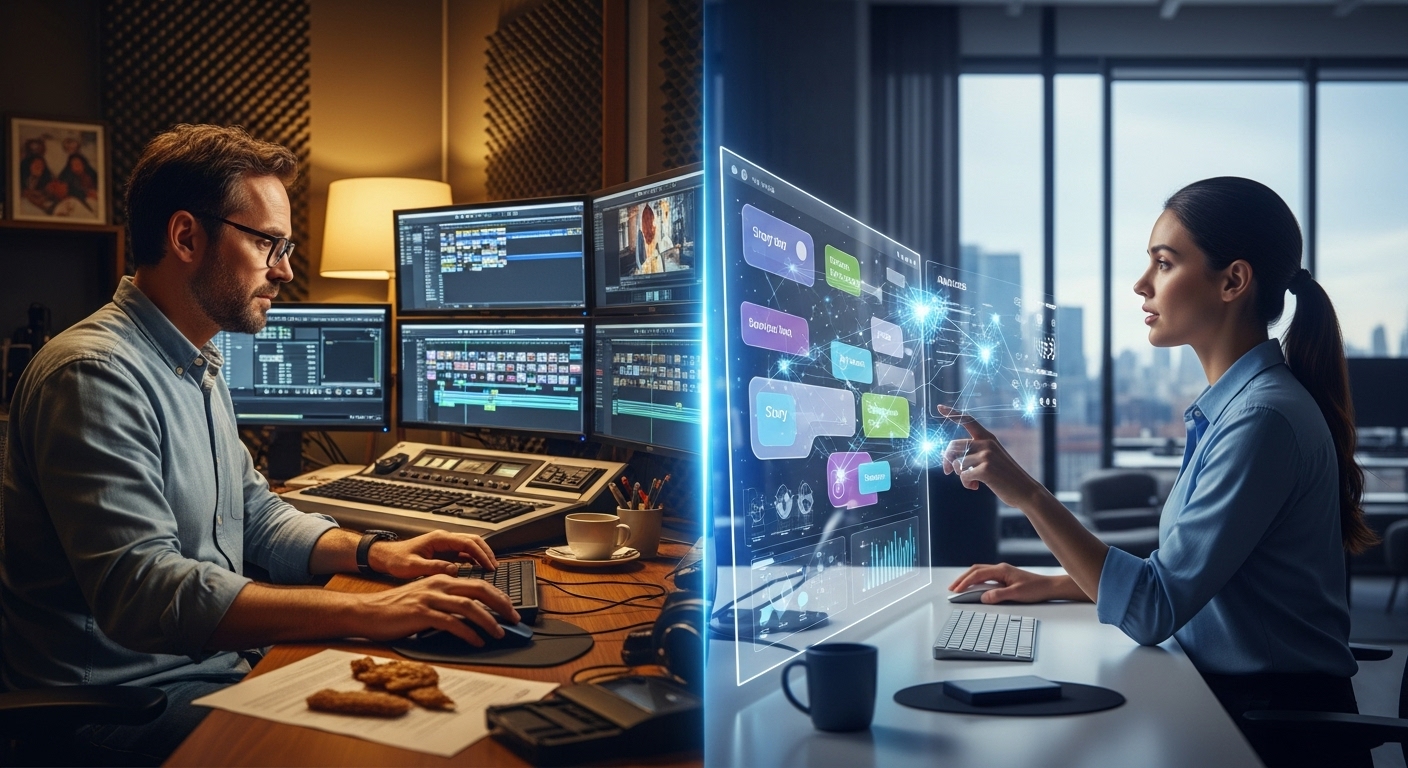
Today, looking at my timeline in DaVinci Resolve or my project files in Descript, the laughter is gone. A quiet, efficient hum of productivity has replaced it.
The landscape of AI editing software for YouTube hasn’t just improved; it has fundamentally rewritten the job description of a content creator. We are no longer just “editors”—cutters of clips and movers of blocks. We are becoming “curators.” The grunt work—the silence removal, the color matching, the audio leveling—is being offloaded to neural networks, leaving us with the only task that actually matters: storytelling.
But let’s be real for a second. If you believe the marketing hype, you might think you can press a “Make Viral Video” button and walk away to sip a latte. That is a lie.
I’ve spent the last 18 months rigorously testing the leading AI tools on real channels—from faceless cash-cow operations to personality-driven vlogs and high-stakes corporate documentaries. I’ve seen the magic, but I’ve also seen the mess.
This guide is not a listicle of “Top 10 Tools.” It is a deep dive into the practical, hands-on reality of building an AI-assisted workflow. It’s about understanding where these tools save you hours and where they might cost you your audience’s trust.
Part 1: The Philosophy of the “Hybrid” Editor
Before we touch the software, we need to adjust our mindset. The biggest mistake I see new YouTubers make is using AI to replace creativity. They use AI scriptwriters (which usually sound robotic), AI voiceovers (which lack subtext), and AI stock footage (which looks like a fever dream). The result is “Zombie Content”—it seems alive, but there’s no soul behind the eyes.
The winning strategy for 2026 and beyond is Hybrid Editing.
Hybrid Editing means identifying the parts of the process that are “computational” versus “creative.”
- Computational (Delegate to AI): Removing pauses, balancing audio levels, transcribing, rotoscoping, color matching, and finding clips in a 3-hour stream.
- Creative (Keep for Humans): Pacing, comedic timing, emotional arcs, J-cuts, music selection, narrative structure.
When you use AI editing software for YouTube to handle the computational load, you aren’t being lazy; you are buying back your brain power to focus on the creative.
Part 2: The Rough Cut Revolution (Text-Based Editing)
The most painful part of YouTube editing has always been “The Radio Edit”—scrubbing through raw footage to assemble a coherent story if I shoot 45 minutes of footage for a 10-minute video, that used to mean at least two hours of just listening and chopping.
The Descript Paradigm
Enter Descript (and its competitors like Riverside and Premiere Pro’s Text-Based Editing). If you haven’t used these yet, picture a Word document that is glued to your video file. You delete a sentence in the text, and the video cuts that clip.
I recently edited a sit-down interview with a subject who had a terrible habit of starting sentences, stopping, apologizing, and starting again.
- Old Way: Watch the waveform. Listen. Cut. Ripple delete. Repeat 200 times.
- AI Way: I looked at the transcript. I saw the repeating text. I highlighted the bad takes and hit backspace.
The “Filler Word” Trap
Most of these tools have a “Remove Filler Words” button. It finds every “um,” “uh,” and “like” and deletes them instantly.
- Expert Insight: Be careful here. I once nuked all filler words from a heartfelt apology video. The result was a robotic, rapid-fire delivery that made the speaker sound sociopathic. Humans say “um” when they are thinking or emotional.
- My Rule: I remove 80% of filler words to clean up the flow, but I leave them in during moments of high emotion or complex thought. It feels more authentic.
Silence Removers: The Jump Cut Kings
For gaming channels, tutorials, or high-energy commentary, “dead air” is retention poison. Tools like TimeBolt or Gling specialize in this. They analyze the audio waveform and strip out silence faster than any human could.
- Real World Case: I ran a 2-hour Twitch stream VOD through a silence remover. It condensed it to 1 hour and 15 minutes of pure talking.
- The Downside: It creates a “staccato” visual effect. To fix this, you need to zoom in (on) every cut or overlay B-roll. If you leave the jump cuts raw, they can be exhausting to watch.
Part 3: Audio Engineering for the Non-Audio Engineer
If video is 50% audio (and it is), then AI has saved more videos than any camera upgrade ever could. Bad audio is the number one reason viewers click off a YouTube video.
The “Studio Sound” Miracle
Adobe created a shockwave with Adobe Podcast Enhance. You upload a grainy iPhone voice memo recorded in a bathroom, and it spits out audio that sounds like it was recorded on a Shure SM7B in a treated studio.
However, experienced editors know it has a flaw: it can sound too perfect. It removes the “room tone”—the natural ambience of the space. It can make you sound like you’re in a vacuum.
- My Workflow: I never run the mix at 100%. I usually dial the AI enhancement back to about 30-40%. This cleans up the echo and noise but keeps the voice sounding human and grounded in the environment.
Music and Remixing
One of the most tedious tasks in Premiere Pro used to be cutting a music track to fit the video length. You have a 3-minute song, but your montage is 3 minutes and 14 seconds. You have to find a beat, cut, cross-fade, and pray the cymbal crash lines up.
Adobe’s Remix Tool (powered by Adobe Sensei) analyzes the song’s structure. You drag the end of the music clip to the length you need, and the AI rearranges the verses and choruses to end ideally on the beat at that timestamp. It’s seamless. I use this on almost every single video I produce. It saves me perhaps 15 minutes per project, but over a year, that’s weeks of my life back.
Part 4: The Visuals (Generative AI and Restoration)
This is where things get controversial, but also incredibly powerful. We aren’t just cutting existing footage anymore; we are generating new pixels.
The “Generative Fill” Use Case
You’ve likely seen the memes about Photoshop’s Generative Fill, but for video, it’s a lifesaver for one specific YouTube problem: Aspect Ratio.
Let’s say you shot a horizontal (16:9) video but need to post a vertical Short (9:16). Usually, you have to crop in, losing a lot of the image.
With Generative Expand (in Photoshop or beta video tools like Runway), you can take a horizontal clip and ask the AI to “draw” the top and bottom of the frame that didn’t exist.
- Does it work? Mostly. It’s great for static backgrounds. If you try to generate complex movement, it gets weird and warpy. But for extending a sky or a studio wall to make a thumbnail or a Short? It’s industry standard now.
Rotoscoping with Magic Mask
If you use DaVinci Resolve Studio, the “Magic Mask” alone is worth the price of admission.
In the old days, if I wanted to put text behind my head but in front of the background, I had to trace my body frame by frame manually. It’s called rotoscoping, and it is miserable work.
With Magic Mask, I draw a squiggle on my face. The Neural Engine understands “this is a person” and automatically tracks me.
- The Result: High-production value “depth” effects that take 3 minutes instead of 3 hours. This is how you elevate a YouTube channel from “amateur” to “pro” without a budget.
Upscaling Archive Footage
I often work on video essays that use old 480p footage from the early 2000s or even VHS rips. On a 4K monitor, these look terrible. AI upscaling tools (like Topaz Video AI) are essential here. They don’t just sharpen; they analyze the data and hallucinate new details from surrounding pixels.
- Warning: Don’t overdo it. If you crank the settings too high, faces start to look like wax figures. Subtlety is key.

Part 5: The Short-Form Industrial Complex
YouTube Shorts are currently the biggest growth engine for long-form channels. But editing Shorts is a different beast than editing long-form. It requires a different pace, different cropping, and different captioning styles.
The “Clipper” Tools
Tools like Opus Clip, Munch, and Dumme are designed to ingest a long YouTube link and spit out 10-20 viral clips.
I tested Opus Clip on a 1-hour interview I edited.
- The Good: It correctly identified the “hooks”—the most interesting questions and answers. It also used face-tracking to keep the active speaker in the center of the vertical frame, even as it cut back and forth between host and guest.
- The Bad: It sometimes cuts the punchline of a joke because the audio volume drops. AI correlates “loudness” and “active keywords” with importance. It doesn’t understand irony or subtle humor.
The Workflow for 2026:
Don’t let the AI post for you. Use these tools to find the “Gold.” Let Opus generate 10 clips. Pick the best 3. Then, pull those into your main editor (Premiere/CapCut) and polish them manually. Fix the captions (AI often misspells proper nouns), adjust the timing, and add your own branding. Use the AI as a rough-cut assistant, not a producer.
Part 6: The Learning Curve and Hardware Reality
There is a hidden cost to AI editing software for YouTube that nobody talks about: Hardware Requirements.
Cloud-based tools like Descript or Opus run on the company’s servers so that you can use them on a Chromebook. But if you are using the AI features inside Premiere Pro or DaVinci Resolve (like Magic Mask, Speech Enhancement, or Remix), you are relying on your own GPU.
If you are editing on a 5-year-old laptop, hitting the “Enhance Speech” button might freeze your computer for 20 minutes. The “Neural Engines” in these software suites are hungry. If you are serious about integrating local AI into your workflow, you need an NVIDIA RTX card (recommended 3060 or higher) or a Silicon-based Mac (M1 Pro or higher). Without the hardware, the AI slows you down rather than speeding you up.
Part 7: The Ethical Dilemma and Building Trust
We have to address the elephant in the room: Authenticity.
YouTube is a platform built on parasocial relationships. Viewers watch you because they trust you. The more you outsource to AI, the greater your risk of breaking that connection.
The “Uncanny Valley” of Eye Contact
There are features in NVIDIA Broadcast and Descript called “Eye Contact.” It digitally alters your pupils to make them look like you are staring at the camera, even if you are reading a script on your desk.
- My Advice: Do. Not. Use. This.
- It looks terrifying. It removes the natural saccades (micro-movements) of the human eye. Viewers might not be able to articulate why they feel uncomfortable, but they will feel it. It triggers a primal “something is wrong” instinct. It is better to look at your notes and be human than to stare into your viewer’s soul like a robot.
The Homogenization Problem
Have you noticed that thousands of Shorts suddenly have the same font, the same colors (yellow and white), and the same “stock AI” b-roll images?
This is the danger of relying too heavily on templates. When everyone uses the same AI tools in the same default mode, all content starts to look the same.
To stand out, you must customize. Change the font. Grade the footage differently. Use your own b-roll. Use AI to handle the technical invisible stuff, not the visible stylistic stuff.
Part 8: A Realistic Professional Workflow (Step-by-Step)
If I were launching a new channel today, with limited time and a goal of high quality, this is precisely how I would structure my editing pipeline:
- Ingest & Transcribe:
- Drop raw footage into Descript. Let it transcribe. Read through the text and delete the fluff, the bad takes, and the rambling. Use this to build the story structure.
- Export to NLE:
- Export an XML file from Descript and open it in Premiere Pro or DaVinci Resolve. Now I have a timeline with all the cuts already made.
- Audio Repair:
- Apply Voice Isolation or Enhance Speech to the dialogue track. Dial it into the “Goldilocks zone” (not too processed, not too noisy).
- The Human Cut:
- Watch the video. This is where I add the “feel.” I adjust the pacing. I add J-cuts (where the audio of the next scene starts before the video). I add zooms to emphasize punchlines. AI cannot do this well yet.
- B-Roll & Visuals:
- I look for gaps in the visual story. I use stock footage or my own shots. If I need a specific graphic, I might use Photoshop’s Generative Fill to create a clean background for text.
- Color & Final Polish:
- Apply a color grade. Run the Music Remix tool to get the background track to fit perfectly.
- Repurposing:
- Once the main video is done, I feed the final render into Opus Clip to get ideas for Shorts. I take the best clip, bring it back into my editor, and refine it for vertical viewing.

Part 9: The Future of AI Editing
Where is this going? The technology is moving so fast that tutorials written six months ago are obsolete.
The next frontier is Text-to-Video B-Roll. Right now, tools like Sora (OpenAI) and Gen-3 (Runway) are on the verge of allowing us to generate high-definition, realistic video clips from a prompt. Imagine you are talking about “ancient Rome” in your video. Instead of buying a stock clip, you type “Cinematic drone shot of the Roman Forum, 50BC, golden hour,” and the AI generates a unique clip for you.
This will revolutionize documentary and storytelling channels. However, it raises significant copyright and ethical concerns that the industry hasn’t yet solved.
We are also seeing Style Transfer. Soon, you will be able to edit a video and tell the AI, “Grade this to look like a Wes Anderson film” or “Edit this to the pace of a MrBeast video.” The AI will adjust the color palette and cut frequency accordingly.
Conclusion: The Pilot and the Autopilot
AI editing software for YouTube is like the autopilot system on a modern airplane.
The autopilot (AI) can fly the plane straight and level. It can handle the boring parts of the journey. It can make micro-adjustments to save fuel. It makes the pilot’s life infinitely easier and safer.
But the autopilot cannot take off or land. It cannot handle an emergency, and it doesn’t know where the plane is supposed to go.
You are the pilot. You determine the destination (the story). You handle the takeoff (the hook) and the landing (the call to action). You monitor the systems to ensure the AI isn’t doing anything stupid.
If you resist these tools, you are choosing to fly manually in a world where your competitors are using jets. You will burn out. But if you surrender entirely to the tools, you become a passenger in your own channel.
The magic happens in the middle. Use the software to strip away the friction, so that when you sit down to edit, you aren’t fighting with the timeline—you are playing with ideas. That is the promise of AI editing, and for the first time in history, it’s actually delivering on it.