AI software to enhance images for YouTube has completely transformed how creators approach visual content. Whether you’re crafting eye-catching thumbnails, cleaning up video stills, or restoring archival footage, these powerful tools have become essential for anyone serious about growing their channel.
When I first started creating YouTube content back in 2019, I made every rookie mistake imaginable. Shot videos in terrible lighting. Used a smartphone camera that belonged in a museum. And my thumbnails? Let’s just say they looked like they were designed during a particularly chaotic fever dream.
Discovering AI software to enhance images for YouTube changed everything for me. Suddenly, I could salvage poorly lit shots, upscale low-resolution captures, and create thumbnails that actually made people want to click.
Fast forward to today, and I’ve spent the better part of three years testing, comparing, and occasionally cursing at various AI enhancement tools. This guide represents what actually works, what’s overhyped, and how to integrate these tools into a realistic YouTube workflow.
Why Image Quality Matters More Than Ever on YouTube
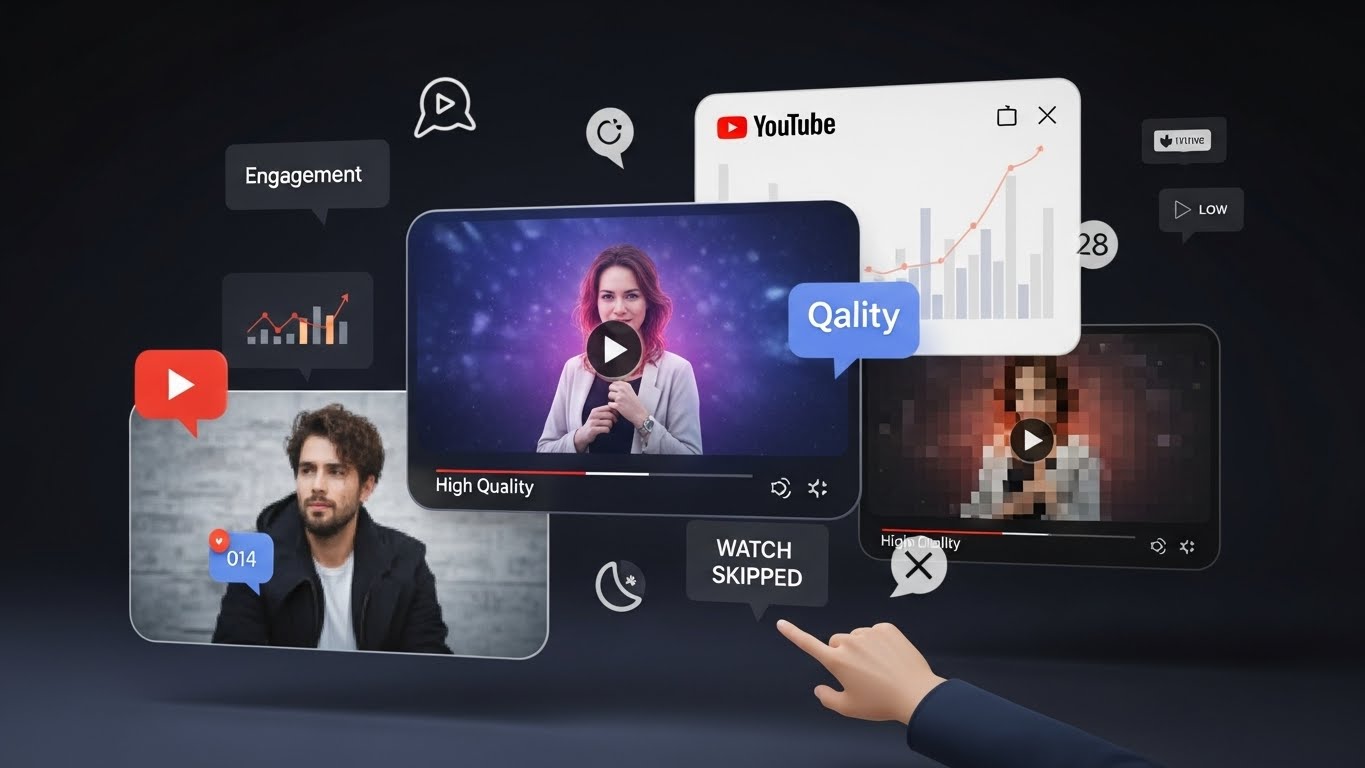
Here’s something that still surprises newer creators: YouTube’s algorithm doesn’t just care about your content. It cares about how people interact with your content. And nothing tanks watch time quite like poor visual quality.
A study from Wistia found that viewers will tolerate mediocre audio far longer than poor video quality. Within the first few seconds, people make subconscious judgments about whether your content is worth their time. Blurry thumbnails, grainy video stills, and muddy colors signal “amateur” to the viewer’s brain before they even realize it.
But here’s the good news: you don’t need a $15,000 camera rig to produce professional-looking content anymore. AI software to enhance images for YouTube has democratized visual quality in ways that seemed impossible just five years ago.
Understanding What AI Image Enhancement Actually Does
Before diving into specific tools, let’s get clear on what these programs actually accomplish. AI image enhancement isn’t magic—though it sometimes feels like it. These tools use machine learning algorithms trained on millions of images to predict and fill in visual information.
Upscaling and Resolution Enhancement
The most common use case. You’ve got a 720p screenshot or a low-resolution product image, but you need it to look crisp at 1080p or 4K. Traditional upscaling just stretches pixels, creating that characteristic blurriness. AI upscaling actually generates new pixel information based on what the algorithm predicts should be there.
I remember upscaling some old footage from a trip to Japan for a travel compilation video. The original clips were 480p nightmares shot on a point-and-shoot camera. After running them through AI upscaling, they weren’t suddenly 4K masterpieces—let’s be realistic—but they were perfectly usable for B-roll.
Noise Reduction and Clarity
Ever shot video in low light and ended up with that grainy, speckled mess? AI noise reduction algorithms can clean up those images while preserving important details. This is particularly valuable for YouTubers who don’t have professional lighting setups.
Color Correction and Enhancement
Some AI tools analyze your image and automatically adjust color balance, contrast, and saturation based on what the algorithm determines looks most natural or appealing. This can be a massive time-saver for creators processing dozens of images for thumbnails or video overlays.
Face Enhancement and Restoration
Several tools specialize in facial enhancement—smoothing skin, sharpening eyes, and correcting lighting specifically on faces. For talking-head content creators, this can make a significant difference in overall production value.
Background Enhancement and Removal
While not strictly “enhancement,” AI-powered background tools have become essential for many YouTube workflows. Whether you’re creating thumbnails with custom backgrounds or cleaning up busy shots, these features are now standard in most enhancement suites.
The Best AI Software to Enhance Images for YouTube Creators
After extensive testing across different use cases, here’s my honest assessment of the tools that actually deliver results.
Topaz Photo AI
This is the tool I reach for most often, and there’s a reason it’s become the industry standard for many professional creators.
Topaz Photo AI combines upscaling, noise reduction, and sharpening into a single, streamlined workflow. What sets it apart is the level of control you get. Unlike some tools that just apply automatic adjustments, Topaz lets you fine-tune exactly how much enhancement you want in different areas.
For YouTube specifically, I’ve found it invaluable for:
- Upscaling thumbnail images captured from video footage
- Cleaning up low-light interview shots
- Enhancing product photography for review videos
- Restoring old archival footage for documentary-style content
The one-time purchase model (around $199 for the full suite) makes it cost-effective compared to subscription services, especially for creators who use it regularly.
Limitations: It can be slow on older hardware, and the learning curve is steeper than some alternatives. Processing times for batch work can test your patience.
Adobe Photoshop’s Neural Filters
If you’re already in the Adobe ecosystem, the Neural Filters built into Photoshop have become surprisingly capable. The “Super Resolution” feature in Adobe Camera Raw does genuine heavy lifting for upscaling, and the various portrait enhancement filters work well for thumbnail creation.
What I appreciate about Adobe’s approach is the integration. You’re not jumping between applications—everything happens within your existing workflow. For creators who already pay for Creative Cloud, this represents significant added value without additional cost.
Limitations: Requires Creative Cloud subscription (approximately $20-55/month depending on your plan). Some filters still feel experimental, and results can be inconsistent.
Gigapixel AI (Also from Topaz Labs)
For pure upscaling work, Gigapixel remains the gold standard in my experience. When you need to take a small image and blow it up to thumbnail or even video overlay size without losing quality, this tool consistently outperforms alternatives.
I’ve tested it against built-in upscaling in Photoshop, Premiere Pro, and various free tools. The difference is noticeable, particularly in how it handles textures and fine details like hair, fabric patterns, and text.
Limitations: Single-purpose tool, so you’ll still need other software for noise reduction and color work. It can be memory-intensive for complex images.
Remini
Here’s an option that surprises people: Remini started as a mobile app for enhancing old photos, but its web and desktop versions have become genuinely useful for YouTube creators on a budget.
The facial enhancement capabilities are particularly impressive. If you’re creating thumbnails featuring faces and want them to pop, Remini can add that professional sharpness and clarity that makes viewers pause while scrolling.
Limitations: Heavy focus on facial enhancement means it’s less versatile. The free tier has significant limitations. Some results can look overly processed if you’re not careful.
Let’s Enhance
This browser-based option doesn’t require any software installation, which makes it perfect for creators who work across multiple devices or don’t want to tax their local hardware.
The upscaling quality is solid—not quite Topaz-level, but absolutely acceptable for most YouTube use cases. The color enhancement features are particularly good, often salvaging images with poor original white balance.
Limitations: Subscription-based pricing can add up. Being browser-dependent means you’re reliant on their servers, which can be slow during peak times.
Luminar Neo
Skylum’s Luminar Neo has carved out a niche for creators who want AI enhancement combined with more creative editing tools. The sky replacement, accent AI, and structure AI features are particularly relevant for YouTube thumbnail creation.
What I find useful here is the template and preset system. You can create a look that works for your brand, save it, and apply it consistently across all your thumbnail images. That kind of workflow efficiency matters when you’re uploading multiple times per week.
Limitations: Can feel overwhelming with all the options. Annual subscription model. Some AI features produce obviously artificial results if pushed too far.
VanceAI
VanceAI offers a collection of AI tools covering upscaling, denoising, sharpening, and more. The pay-per-credit model can actually work in favor of creators who don’t need constant access to enhancement tools.
I’ve found their “Image Denoiser” particularly effective for cleaning up screenshots and screencaps for tutorial-style content. If you’re doing software walkthroughs or gaming content, this is worth considering.
Limitations: The credit system can become expensive for heavy users. A web-based platform has similar speed concerns as other cloud options.
Choosing the Right AI Software to Enhance Images for YouTube
With so many options, decision paralysis is real. Here’s how I’d approach the choice based on different creator situations.
For Beginners on a Budget
Start with Remini’s free tier and Adobe’s built-in tools if you already have Photoshop. Learn what enhancement does and doesn’t do for your specific content. Many creators discover they only need basic upscaling, which plenty of free tools handle adequately.
For Consistent Thumbnail Creators
Invest in Topaz Photo AI or Gigapixel. The upfront cost pays for itself in time saved and quality improvement. Combine with Canva or Photoshop for the design elements.
For Video Editors Who Need Occasional Image Enhancement
Adobe’s integrated tools make the most sense if you’re already editing in Premiere Pro. The workflow efficiency of staying in one ecosystem outweighs marginal quality differences.
For Professional-Level Production
Consider combining tools strategically. I typically run critical images through Topaz Photo AI for upscaling and noise reduction, then into Lightroom for color grading, then into Photoshop for final compositing. Each tool excels at its specialty.
Real-World Workflow Integration
Let me walk through how I actually use these tools in a typical video production cycle.
Thumbnail Creation Workflow
- Capture source images during filming—dedicated thumbnail shots plus screenshots from the best video moments
- Initial processing in Lightroom for exposure and basic color correction
- Upscale if necessary using Topaz Photo AI (I typically work at 2x upscale for thumbnails)
- Face enhancement featuring a person—subtle sharpening of the eyes and skin smoothing
- Export to Photoshop for text overlay and final composition
- Final color pop using a saved thumbnail preset that ensures brand consistency
The entire process takes maybe 15-20 minutes for a polished thumbnail. Before AI tools, I’d easily spend an hour or more getting similar results.
Video Still Enhancement
For images used within videos—lower thirds, B-roll stills, comparison screenshots—the workflow is simpler:
- Capture the best quality source available.
- Batch process through AI upscaling (I usually run 5-10 images at once)
- Basic color matching to ensure consistency with the overall video tone
- Import directly into Premiere Pro or Final Cut
Archival Footage Integration
Documentary-style content often requires incorporating old photos or video captures. This is where AI enhancement genuinely shines.
I recently worked on a project incorporating family photos from the 1970s. The originals were faded, scratched, and low resolution. After processing through a combination of restoration and upscaling tools, they cut seamlessly with modern 4K footage. That simply wasn’t achievable without AI intervention.
Common Mistakes and How to Avoid Them
After three years of working with these tools, I’ve made plenty of errors. Save yourself some frustration.
Over-processing
The biggest temptation. AI tools can dramatically enhance images, but there’s a point where enhancement becomes distortion. Skin looks waxy. Textures become unnaturally sharp. Colors pop beyond reality.
Solution: Always compare your enhanced image to the original. Ask yourself: “Does this look better, or just different?” Subtle enhancement almost always beats aggressive processing.
Ignoring Source Quality
AI can’t create information from nothing. If your original image is hopelessly blurry, dark, and small, no amount of enhancement will save it. The garbage-in-garbage-out principle applies absolutely.
Solution: Capture the best possible source material. AI enhancement should elevate good images to great ones, not resurrect terrible ones.
Inconsistent Processing
Your YouTube channel should have a consistent visual identity. If every thumbnail uses different enhancement settings, your content looks disjointed.
Solution: Create presets and templates. Document your settings. Apply consistent processing across similar content types.
Neglecting File Size
AI-enhanced images can balloon in file size, especially upscaled images. This matters for YouTube because oversized thumbnails may not upload properly, and large images in video editing projects can slow down your system.
Solution: Export at appropriate sizes and compression levels. A YouTube thumbnail doesn’t need to be 8000 pixels wide.
Ethical Considerations Worth Mentioning
AI image enhancement exists in a slightly gray area that responsible creators should acknowledge.
Authenticity questions: When you enhance a face, smooth skin, or brighten eyes, you’re changing reality. For beauty and lifestyle content, this raises legitimate concerns about promoting unrealistic standards. I’ve personally adopted a “enhance but don’t fabricate” guideline—I’ll clean up noise and sharpen details, but I won’t dramatically alter how I or others actually look.
Disclosure considerations: Most viewers understand that professional content involves editing. However, for sponsored content or reviews, dramatically enhancing product photos could border on misleading. Use judgment here.
Copyright implications: Some AI enhancement tools are trained on copyrighted images, raising unresolved legal questions. Stick to reputable tools with clear terms of service.
Performance and Hardware Considerations
AI image enhancement is computationally intensive. Knowing what to expect helps avoid frustration.
GPU matters: Most modern AI enhancement software leverages GPU processing. A dedicated graphics card (NVIDIA tends to have better compatibility) dramatically improves processing speed.
RAM requirements: Plan for at least 16GB of RAM for smooth operation. 32GB is more comfortable for batch processing or handling large files.
Storage speed: Working from an SSD rather than a traditional hard drive makes a noticeable difference, especially when processing multiple images.
Cloud alternatives: If your hardware is limited, cloud-based tools like Let’s Enhance or VanceAI offload processing to their servers. You trade privacy and internet dependency for hardware flexibility.
Looking Forward: The Future of AI Image Enhancement for YouTube
The technology continues to advance rapidly. Features that were impressive a year ago are now standard, and capabilities that seemed impossible are becoming accessible.
Real-time enhancement is coming to video workflows. Adobe’s early experiments with AI-enhanced video preview suggest a future where enhancement happens during editing rather than requiring separate processing.
Specialized tools for YouTube-specific use cases are emerging. Thumbnail generators, auto-upscalers integrated into editing software, and channel-aware enhancement that learns your visual style.
Quality ceiling keeps rising. What we consider “enhanced” today will seem basic compared to what’s achievable in 2-3 years. The gap between amateur and professional visual quality continues to narrow.
Final Thoughts
AI software to enhance images for YouTube isn’t a magic solution, but it’s become an essential part of the modern creator’s toolkit. The right tools, used thoughtfully, can elevate your content’s visual quality in ways that genuinely impact viewer engagement and channel growth.
Start with one tool that fits your budget and needs. Master it before adding complexity. Pay attention to what actually improves your content rather than chasing features you’ll never use.
And remember—while AI can enhance images, it can’t replace good content, authentic connection with your audience, or consistent effort. Consider these tools as amplifiers of your existing work, not shortcuts to success.
The creators who thrive are those who view AI enhancement as one component of a larger production philosophy: do whatever it takes to deliver value to your audience in the most professional, engaging way possible.
Now, if you’ll excuse me, I have about forty thumbnail images to process before my next upload deadline. These tools may be powerful, but they haven’t quite eliminated the work. Yet.