
AI-powered design tools for beginners have arrived with the force of a tsunami, and if I’m being totally honest with you, they’ve left a lot of us professionals feeling a mix of awe and existential dread. I still remember my first week in a design agency nearly fifteen years ago. I spent three full days just masking the hair on a model in Photoshop. It was tedious, eye-straining, carpal-tunnel-inducing work that required a steady hand and infinite patience. Last week, I watched a marketing junior—who has never formally studied color theory and thinks “kerning” is a type of German pastry—complete the same task in 4 seconds with a single text prompt.
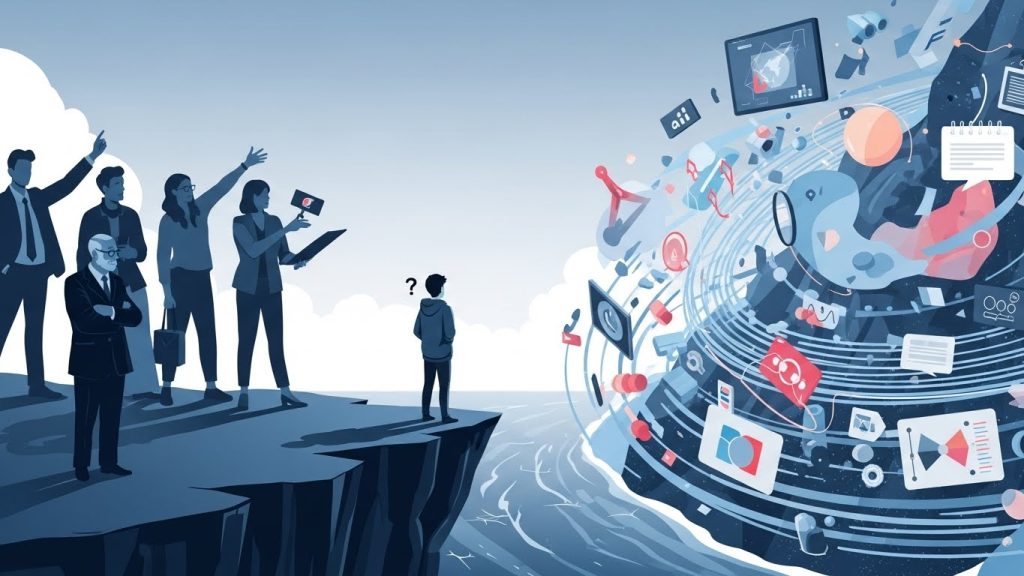
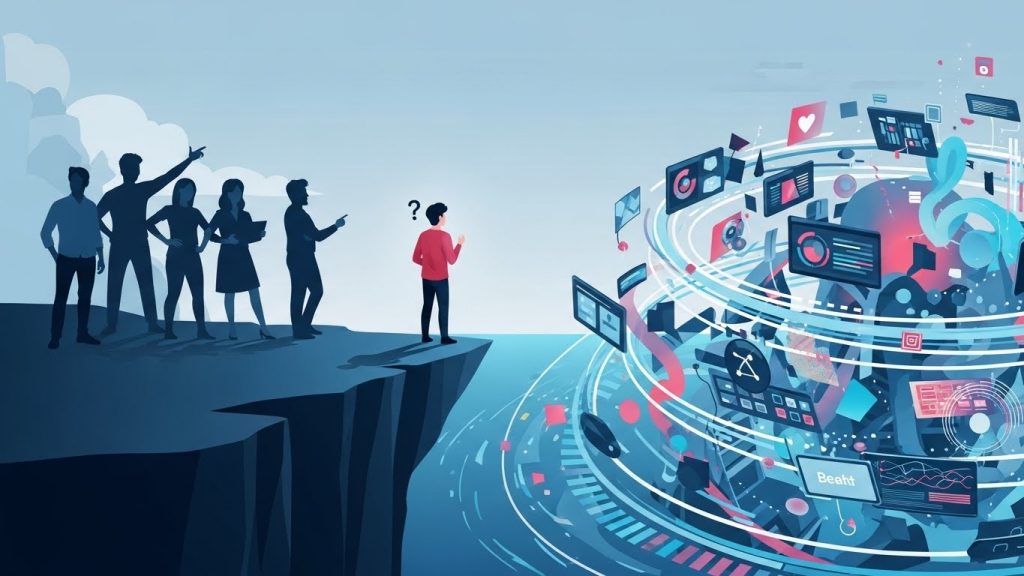
AI-powered design tools for beginners are not just speeding up work; they are fundamentally altering the definition of creativity itself. If you are standing on the edge of the creative cliff, looking down at the swirling ocean of generative technology, you probably feel a confusing mix of exhilaration and paralysis. Every tech influencer on YouTube is screaming that “Design is Dead,” while every seasoned Art Director is rolling their eyes and sipping their coffee. The truth, as usual, is somewhere in the messy, nuanced middle.
AI-powered design tools for beginners represent the biggest democratization of visual ability since the invention of the camera. I’ve spent the last 18 months tearing apart my entire professional workflow to test these tools. I’ve used them for pitch decks, social media assets, rapid prototyping, and client mockups. This article is not a futurist’s prediction of what might happen in a decade. This is a no-nonsense, field-tested guide to getting started with AI design today, written by someone who actually has to deliver files to clients and pay a mortgage. We are going to cover everything from the mindset shift required to use these tools to a granular breakdown of the software, and finally, a realistic look at the ethics and legalities.
Part 1: The Mental Shift – From Operator to Director
AI-powered design tools for beginners require a completely different part of your brain than traditional design software. In the “old days” (read: two years ago), learning design meant learning how to draw a circle, manipulate a Bezier curve, manage layers, and balance RGB values. Today, the software knows how to draw a circle. It knows how to render light reflecting off a chrome sphere. It knows what a sunset looks like. Your job is no longer to be the operator of the pen; your job is to know why the circle should be there in the first place.
AI-powered design tools for beginners turn you from a creator into an Art Director. Your vocabulary is now your paintbrush. If you cannot articulate what you want with precision, the AI will give you a generic, soulless hallucination. The skill you are building here isn’t “mousing” or drawing; it is prompt engineering and curation. You need to develop an eye for what looks “off” because, trust me, the AI will lie to you constantly. It will give people six fingers. It will put the sun in front of the clouds. It will misspell “coffee” as “covfeee.” It is your job to catch that.
AI-powered design tools for beginners still rely heavily on fundamental design principles. The machine can generate a million pixels in seconds, but it doesn’t understand hierarchy, balance, or emotional resonance. It just understands statistical probability. It predicts what pixel is likely to come next based on billions of images it has seen before. That is where your humanity comes in. You are the filter. You are the taste-maker. You determine whether the image evokes the right feeling or just looks like a plastic, shiny mess.
Part 2: The Landscape – Categorizing the Chaos
AI-powered design tools for beginners usually fall into three distinct buckets, and understanding this distinction is key to keeping your sanity. The market is absolutely flooded with “new” tools launching every day on Product Hunt, but I’m going to let you in on a secret: 90% of them are just cheap “wrappers” around the same underlying technology (usually Stable Diffusion or OpenAI’s DALL-E). To avoid subscription fatigue, you really only need to focus on these three categories:
- Text-to-Image Generators: The heavy lifters that create pixels from scratch (Midjourney, DALL-E).
- Integrated Design Assistants: Standard tools that have added AI brains (Canva, Photoshop).
- Utility & Workflow Solvers: The boring but magical tools that fix resolution, vectors, and layouts.
Let’s break down the ones that are actually worth your time, money, and learning curve.
The Heavy Hitters: Text-to-Image Generators
AI-powered design tools for beginners often start with Midjourney, which is, without a doubt, the current heavyweight champion of artistic quality. If you want images that look like award-winning photography, high-end digital art, or cinematic concept art, this is where you go.
- The User Experience: Here is the catch—it operates entirely through Discord (a chat app primarily used by gamers). For a beginner, this feels incredibly clunky and unintuitive. You aren’t clicking buttons on a website; you are typing commands like /imagine into a chaotic chat room full of other people.
- The Output: The lighting, texture, and composition are often breathtakingly good right out of the box. It understands “vibe” and “atmosphere” better than any other model.
- Best For: High-concept imagery, mood boards, album art, artistic styles, and inspiration. It struggles with specific text placement, so don’t ask it to design a logo with your company name spelled correctly.
AI-powered design tools for beginners who prioritize ease of use should look at DALL-E 3 (via ChatGPT Plus). It is the best “listener” of the bunch.
- The User Experience: If you can send a text message, you can use DALL-E 3. It is built right into ChatGPT. You talk to it conversationally. If you ask Midjourney for a “blue ball on a red table,” it might give you an artistic interpretation with purple shadows because it thinks that looks cooler. DALL-E 3 will give you exactly a blue ball on a red table.
- The Output: The images can sometimes look a bit “plastic” or overly smooth compared to Midjourney’s grit. It has a very specific “AI sheen” that is becoming recognizable.
- Best For: Beginners who want a conversational interface. It’s great for literal interpretations, brainstorming, and following complex instructions involving specific object placement (e.g., “Put the cat on the left and the dog on the right”).
AI-powered design tools for beginners in the corporate world should gravitate toward Adobe Firefly.
- The User Experience: Integrated into a clean web interface and directly into Adobe apps like Photoshop and Illustrator.
- The Output: The quality is solid, specifically for photorealism, though it sometimes lacks the artistic flair of Midjourney.
- The Unique Selling Point: It was trained on Adobe’s own stock library. This means it is “commercially safe.” If you are designing for a client who is terrified of copyright lawsuits, you use Adobe. It creates a “paper trail” of ownership that makes legal departments happy.
The Pragmatic Workhorses: Integrated Suites
AI-powered design tools for beginners have found a home in Canva (Magic Studio), which has successfully bridged the gap for the non-designer.
- Real-World Use: I use Canva’s “Magic Expand” constantly. Let’s say you have a vertical photo but need a horizontal banner for a website header. In the past, you had to crop it awkwardly or stretch it. Now, the AI analyzes the photo and “invents” the rest of the background to fill the space. It’s not perfect—sometimes it adds weird artifacts—but it works 90% of the time.
- Why it wins: It integrates the generation with the layout. You generate the image, then slap text over it using their templates. It keeps you in one tab, streamlining the workflow.
AI-powered design tools for beginners also include Adobe Photoshop (Generative Fill), which is the industry standard for a reason.
- Real-World Use: You circle a part of an image and type “remove tourist” or “add sunglasses.” It does it, matching the lighting, perspective, and grain of the original photo. It is less about creating new worlds and more about editing the current one seamlessly. This is the feature that made jaws drop when it was released.
Part 3: The Art of the Prompt – How to Talk to Machines
AI-powered design tools for beginners are useless without the skill of prompting. I see so many people try these tools once, type “cool car,” get a generic image, and then say “AI is overhyped.” You don’t need to buy a “PDF of 10,000 Prompts” from a guru on Twitter. You just need to understand the syntax of how these models “think.”
AI-powered design tools for beginners respond best to a structured approach: [Subject] + [Action/Context] + [Artistic Style] + [Technical Parameters].
Let’s look at a real-life comparison to see how this works.
- The Bad Prompt: “A picture of a dog.”
- The Result: You will get a generic, stock-photo-looking dog. It will be boring, flat, and uninspired.
- The Better Prompt: “A golden retriever running in a park, happy.”
- The Result: Better. You have action and emotion now. But it still looks like a generic dog food advertisement.
- The Expert Prompt: “A low-angle action shot of a golden retriever catching a neon frisbee, golden hour lighting, cinematic depth of field, dust particles in the air, shot on 35mm film, hyper-realistic, highly detailed fur– ar 16:9.”
AI-powered design tools for beginners rely heavily on specific technical parameters. Here is what matters most:
- Lighting: Don’t just leave it to chance. Specify “rembrandt lighting” for drama, “neon lighting” for a tech vibe, “overcast soft light” for portraits, or “harsh sunlight” for realism. Lighting changes the image’s emotion more than the subject does.
- Camera Angles: Use film terms. “Wide angle,” “macro lens” (for close-ups), “drone shot,” “eye-level.” This tells the AI where to position the “virtual camera.”
- Style: Be specific about the medium. “Synthwave,” “Bauhaus,” “Oil painting,” “Pencil sketch,” “Unreal Engine 5 render,” “Polaroid.”
- Negative Prompting: This is a concept you must learn early. This is telling the AI what not to do. Many tools have a specific box for this. I almost always include things like: “blurry, low resolution, watermark, text, deformed hands, extra limbs, cartoon, 3d render” (if I want a photo). It cleans up the output significantly.
Part 4: Deep Dive – A Realistic Workflow Case Study
AI-powered design tools for beginners are best understood in the context of a real project. Let’s walk through a workflow I actually used recently: creating a promotional flyer for a local “Jazz & Coffee” pop-up night.
Step 1: Ideation (ChatGPT)
I had “writer’s block” visually. I went to ChatGPT and asked: “Act as a creative director. Give me 5 visual concepts for a poster for a moody, late-night jazz event at a coffee shop. The vibe is sophisticated but gritty.”
- The Output: It suggested “Smoke forming the shape of a saxophone,” “Coffee steam turning into musical notes,” and “A noir-style street view through a rainy window.”
Step 2: Asset Generation (Midjourney)
I liked the “Rainy Window” concept. I went to Midjourney to generate the base image.
- Prompt: View through a rainy coffee shop window at night, neon ‘JAZZ’ sign reflecting in the glass, cozy warm interior blurred in background, silhouettes of musicians, raindrops on glass, hyper-realistic, 8k, moody atmosphere –ar 2:3
- The Iteration: It took four tries. The first one was too dark. The second one had a weird face in the window. The third was perfect, capturing the exact melancholy vibe I wanted.
Step 3: Upscaling and Cleaning (Upscale / Photoshop)
Midjourney images are often not high enough resolution for print (usually around 1 megapixel). I used a free open-source tool called Upscale to double the resolution using AI. Then, I brought it into Photoshop. There was a weird artifact that looked like a floating hand in the corner (classic AI glitch). I used “Generative Fill” to remove it instantly.

Step 4: Layout and Typography (Canva)
I uploaded the clean image to Canva. I didn’t want the AI to do the text because AI is terrible at typography, layout, and spelling. I chose a nice serif font, applied a subtle glow to match the image’s neon, and exported the PDF for print.
Total Time: 45 minutes.
Traditional Time: This would have been a 6-hour job involving stock photo hunting, heavy compositing, masking, and color grading.
Part 5: The Niche Solvers – Logos and Vectors
AI-powered design tools for beginners often promise easy logos, but this is a minefield. Let me be blunt: Looka, Tailor Brands, and similar logo generators are great for brainstorming, but potentially dangerous for final branding.
- The Limitation: These tools usually mash up generic clip-art icons with nice fonts. If you use a raw AI logo, you cannot trademark it (more on that later), and five other businesses might have a logo that looks 90% like yours.
- The Strategy: Use them to get ideas for color palettes and font pairings. Then, hire a designer to make something unique, or use the AI output as a sketch to trace over yourself.
AI-powered design tools for beginners have a secret weapon called Vectorizer.ai. If you generate a logo icon in Midjourney, it is a raster image (made of pixels). If you zoom in, it gets blurry. You need a vector (SVG/EPS) for professional printing on t-shirts or signage.
- The Tool: Vectorizer.ai is mind-blowing. You drag in your pixelated AI drawing, and it converts it into crisp, mathematical paths. For a beginner trying to make merchandise or stickers, this is an essential step that bridges the gap between “cool picture” and “usable design file.”
Part 6: The Elephant in the Room – Ethics, Law, and the “Uncanny Valley”
AI-powered design tools for beginners come with baggage. I would be failing you as an expert if I didn’t address the messy, gray areas of this technology.
AI-powered design tools for beginners intersect with complex copyright laws. Currently, the United States Copyright Office has stated that you generally cannot copyright an image generated entirely by AI because it lacks “human authorship.”
- What this means for you: If you generate a mascot for your brand using pure AI and put it on a box, a competitor could technically copy-paste it, and you might have limited legal recourse.
- The Workaround: Use AI for backgrounds, textures, and ideation. Keep your core brand assets (logos, primary characters) human-made or heavily modified by a human. If you paint over the AI image, composite multiple images, or significantly alter it in Photoshop, you have a stronger claim to authorship.
AI-powered design tools for beginners are prone to “Hallucinations.” AI doesn’t know what a handsaw looks like structurally; it knows what a picture of a handsaw looks like statistically. Sometimes, it merges the handle with the blade. I once printed 500 postcards with AI-generated gibberish on a background street sign that I missed on the screen. It was embarrassing. Always zoom in to 100%. Check the fingers. Check the eyes (pupils are often misshapen). Check the reflections in mirrors to see if they match the subject.
AI-powered design tools for beginners are homogenizing style. Because everyone is using the same models (Midjourney v6, DALL-E 3), visual styles are converging. There is a “glossy, high-contrast, orange-and-teal” look that consumers are starting to recognize—and distrust.
- How to fix it: Stop asking for “perfect” images. Ask for “film grain,” “motion blur,” “amateur photography style,” “disposable camera,” or “risograph.” Imperfection is what makes it feel real. Authenticity is the currency of the future.
Part 7: Hardware and Costs – What Do You Actually Need?
AI-powered design tools for beginners used to require massive computing power. Two years ago, if you wanted to run Stable Diffusion (an open-source model), you needed a gaming PC with a massive graphics card (GPU) that sounded like a jet engine and heated up your whole apartment.
AI-powered design tools for beginners are now mostly cloud-based. Today, you can run Midjourney or Firefly on a Chromebook, an iPad, or even your phone. The heavy lifting is done on their supercomputers, not your laptop.
- The Cost: Be prepared for subscriptions. The “free tier” era is mostly ending as these companies try to become profitable.
- Midjourney: ~$10-30/month.
- ChatGPT Plus (DALL-E): $20/month.
- Canva Pro: ~$15/month.
- Adobe Cloud: Expensive ($50+), but industry standard.
- Free Alternatives: Microsoft Designer (uses DALL-E tech) is often free to use. Bing Image Creator is also free. For beginners with zero budget, start there.
AI-powered design tools for beginners who want total privacy can still run things locally. If you get serious and want to run Local Stable Diffusion (for total privacy, no censorship, and no monthly fees), you will need a PC with an NVIDIA RTX 3060 card or higher. It’s a steep technical learning curve involving Python and GitHub, but it gives you total control.
Part 8: Overcoming “Blank Page Syndrome”
AI-powered design tools for beginners are the ultimate cure for creative block. This is where AI truly shines—not as a replacement for your creativity, but as a lubricant for it.
AI-powered design tools for beginners allow for rapid “Mashups.” Ask the AI to combine two unrelated styles. “A coffee maker designed by Apple in the 1980s.” “A sneaker inspired by a gothic cathedral.” “A website layout inspired by a Swiss railway map.” These weird prompts force your brain to see new connections. You might not use the image it generates, but seeing it will spark an idea you can execute yourself.
AI-powered design tools for beginners also offer “reverse prompting.” Midjourney has a /describe command. You can upload a photo you like (maybe a texture or a lighting setup), and it will analyze it and tell you the prompt it would use to create that image. This is the fastest way to learn design vocabulary. You learn that the lighting style you liked is actually called “Volumetric Lighting” or that the color palette is “Pastel Goth.”
Part 9: The Future – Where Is This Going?
AI-powered design tools for beginners are rapidly moving toward video and 3D. We are already seeing tools like Sora and Runway Gen-2 creating video from text. We are seeing tools that generate 3D models for gaming just by describing them.
AI-powered design tools for beginners mean that the learning curve never really ends. But don’t let that scare you. The fundamental skill—Taste—remains constant. The tools will get faster. The resolution will get higher. But the ability to look at an image and say, “This communicates the right emotion,” is a human skill that the machine cannot replicate. The machine has no lived experience. It has never felt heartbreak, or the warmth of the sun, or the taste of a lemon. You have. That is your competitive advantage.
AI-powered design tools for beginners place us in the “Wild West” era of design. It is messy, legalities are murky, and the software updates every Tuesday. But it is also the most exciting time to be a creative since the invention of Photoshop.
Conclusion: Just Start Breaking Things
AI-powered design tools for beginners aren’t something you can learn from reading articles like this one; you have to burn through your credits, making mistakes.
Don’t try to replace a professional designer for your company’s major rebrand—you will fail and look cheap. Instead, use these tools to speed up the boring stuff. Use them to visualize ideas stuck in your head so you can explain them more clearly to a human designer. Use them to make your PowerPoint slides less agonizingly boring.
Go open a prompt window. Type something weird. Ask for a “Cyberpunk hamster eating a taco on Mars.” See what happens. That’s how we all started. And honestly? It’s a hell of a lot more fun than masking hair in Photoshop.